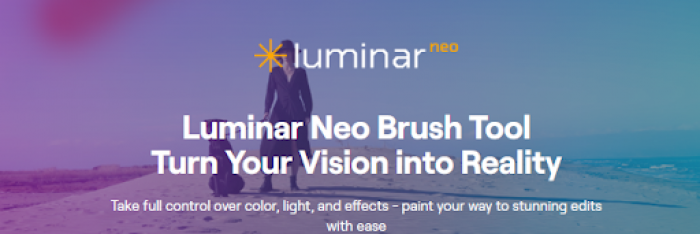
I wasn’t looking for anything revolutionary — just a better way to clean up my edits. I had heard whispers about the Luminar Brush inside Skylum’s Luminar Neo, but I didn’t pay much attention... until I realized how many clicks it was taking me in Lightroom just to dodge a single shadow.
So I downloaded the trial from Skylum’s official site, loaded one of my flat portraits, and stumbled onto something game-changing: the Brush Tool, tucked neatly under the Masking tab.
According to Skylum’s help guide, it lets you apply any enhancement — exposure, color, structure — only where you brush. It’s a selective editing dream, and I hadn’t even scratched the surface yet.
Once I understood what it was, the next question was obvious: how do I actually use it?
How to Use the Brush Tool in Luminar Neo for Selective Adjustments?
By Day 2, I was painting edits like a kid with a new set of crayons. Except this wasn’t some filter-heavy mobile app. This was real photo editing — with real control.
Here’s how I did it:
- Opened the image inside Luminar Neo
- Clicked into any tool, like Light or Structure AI
- Opened Masking → chose Brush
- Adjusted size, softness, and strength
- Painted the effect only on the subject’s face
It was like using a simplified version of Photoshop’s layer masks, but without the headache. Every stroke felt intuitive. I didn’t need tutorials, but just in case, Skylum’s YouTube channel had a quick explainer ready.
With the basics down, I wanted to know: can I use this with Luminar’s AI tools too?
Does Luminar’s AI Work with the Brush Tool?
By Day 3, I had a question: could I use Luminar’s famous AI tools with the brush?
The answer? Absolutely yes — and that’s what makes it a secret weapon.
Let’s say I use Relight AI to fix backlighting on a face. I can brush the effect only onto the face and keep the rest untouched. Or I use Sky AI to replace the sky, then brush around trees to clean up any edges.
According to PetaPixel’s feature on Luminar Neo, these combinations are exactly what Skylum built Neo for: AI meets control.
That made me wonder — how does the brush perform on close-up work like portrait retouching?
Can the Luminar Brush Be Used for Portrait Retouching?
Day 4 was portrait day, and the Luminar Brush earned its place.
I opened a shoot I’d almost thrown away: bad light, flat skin tones, and harsh shadows. Using the Brush Tool, I:
- Applied Skin AI just to the forehead
- Brushed Glow around the cheeks
- Brightened the eyes with Structure AI
- Used Erase to remove some background distractions
With just a few strokes, the image popped subtly. No over-edits. No fake plastic skin. Just control.
This is exactly what Skylum outlines in their Luminar AI portrait editing guide. And it works.
But it got me thinking: how does this compare to the masking tools I’ve used in Lightroom?
Luminar Brush vs Lightroom Masking: Which One Gives You Better Control?
I’ve spent hundreds of hours in Lightroom. I love it. But by Day 5, I had to admit: Luminar’s brush tool is way faster when I need selective edits without jumping through hoops.
Here’s what I noticed:
- In Lightroom, I need to manage multiple masks, feathering, and overlays.
- In Luminar Neo, I pick a tool → mask it, → done.
This Fstoppers review confirmed my gut feeling: Luminar Neo's local tools offer "Photoshop-level control without the mess."
So the brush was winning... but was it equally powerful in both Luminar AI and Neo?
Is the Brush Tool Available in Both Luminar AI and Luminar Neo?
Yes, but Neo is the version you want.
Luminar AI has the brush tool, but no layers, no extensions, and no modular masking.
Luminar Neo, on the other hand, gives you:
- Full layer support
- AI tool compatibility
- Masking with all editing modules
- Access to extensions like Focus Stacking or HDR Merge
As Skylum clearly lays out here, Neo is the future — and it shows.
With full access unlocked, I started experimenting with advanced techniques using AI + brush together.
How to Combine AI Tools with the Brush for Pro-Level Edits in Luminar?
Here’s a pro workflow I fell in love with:
- Use Relight AI to lift the shadows
- Use the Brush Tool to paint the effect just on the subject’s torso
- Use Color to bring warmth to the background
- Brush Glow softly around the edges for cinematic light fall-off
Each brush stroke worked like a stylistic signature — fast, subtle, and clean.
And best of all? I didn’t need to download anything extra to make it work.
Do You Need to Download the Luminar Brush Separately?
No, the Luminar Brush is built into Luminar AI and Neo — no plugins, packs, or separate installs.
Once you install the app from https://skylum.com/luminar-neo, it’s right there inside the Masking menu of every editing tool.
Now that I was experimenting more freely, I started discovering my favorite brush + effect combos.
What Are the Best Effects to Apply with the Luminar Brush?
Some brush-friendly tools that gave me beautiful results:
- Structure AI on textures, jackets, and mountains
- Skin AI softly around cheeks and nose
- Glow just on highlights
- Saturation/Color only on skies or greenery
- Sharpening precisely on the eyes and jewelry
Each time, I could choose exactly where and how to apply the edit — something even Photoshop makes overly complex.
But the game changed even more when I discovered layered masking.
Can You Use Luminar Brush to Create Layered Edits?
Yes — and this is where Luminar Neo felt more like Photoshop than I expected.
I tried a double exposure:
- One layer with foggy trees
- Another with a portrait
- Brushed one into the other across the silhouette
It looked surreal. Like art. And I did it in minutes.
Luminar’s Extensions library makes these layered workflows even stronger, especially if you’re blending bracketed images or compositing product shots.
Of course, to make everything look natural, I had to learn a few tricks with the brush.
Tips to Master the Luminar Brush for More Natural Edits
Here are my go-to habits now:
- Strength: Keep it between 30–60%
- Softness: High for blending, low for precise edges
- Invert and Erase: Use these constantly for refining masks
- Zoom in: Small brush size is perfect for eye retouching
- Layer effects gently for better realism
Skylum’s manual covers these too — but it took some practice to really get the hang of it.
And with that, I knew I had a new essential tool in my workflow.
Final Thoughts: The Luminar Brush Is the Most Underrated Tool in My Workflow
I never thought something as simple as a brush could change how I edit.
But the Luminar Brush did:
- It gave me full control
- It worked with AI tools
- It saved hours
- And most importantly, it made editing fun again
For beginners, it’s intuitive. For professionals, it’s fast. And for me, it’s now non-negotiable.
Post Comment
Be the first to post comment!